
Ardour currently cannot do on-the-fly session rate conversion. So if you ever find yourself needing to permanently change an Ardour session’s sampling rate, one option is to export your tracks from the old session and import them into a new session. Perhaps your hardware changed, or perhaps you need to hand the session off to someone else using a different rate. This lesson shows you how to do stem exports from Ardour and import the stems into a new session.
If you still have access to either your old hardware or to hardware that runs at the old session rate, you can start up Ardour connected to that hardware. If not, you can run JACK using the dummy driver at the old session rate.
Stem exports are also useful when handing off a session to a mix engineer, who may have software other than Ardour.
When you export stems, it’s helpful to have distinctive track and bus names, or at least have bus names that indicate it’s a bus and what that bus does. Ardour will use track/bus names for the exported file names, so descriptive track/bus names will make it easier to sort things out when you import these tracks later.
Export step 1: Open the session at the old rate. In this example, we’re opening a 96kHz session to export to 48kHz.

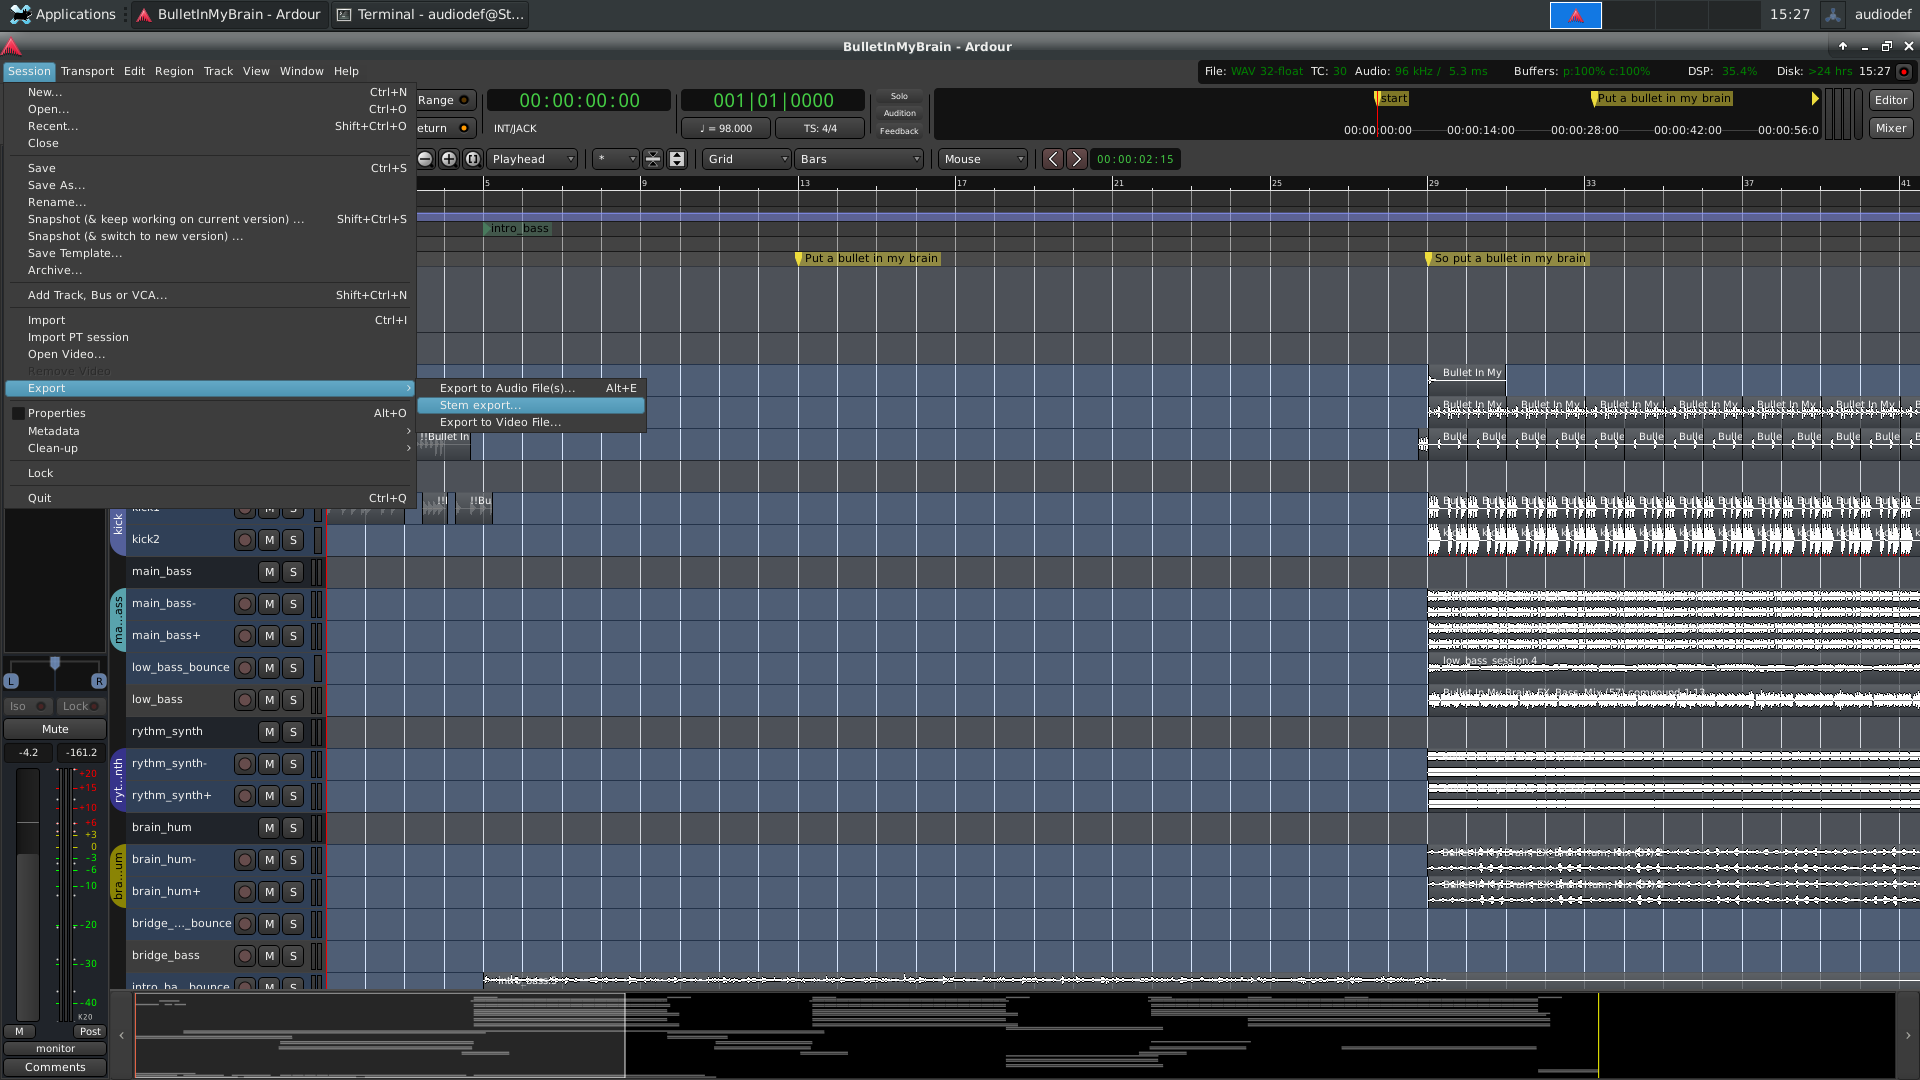
Export step 2: Choose Session -> Export -> Stem export.
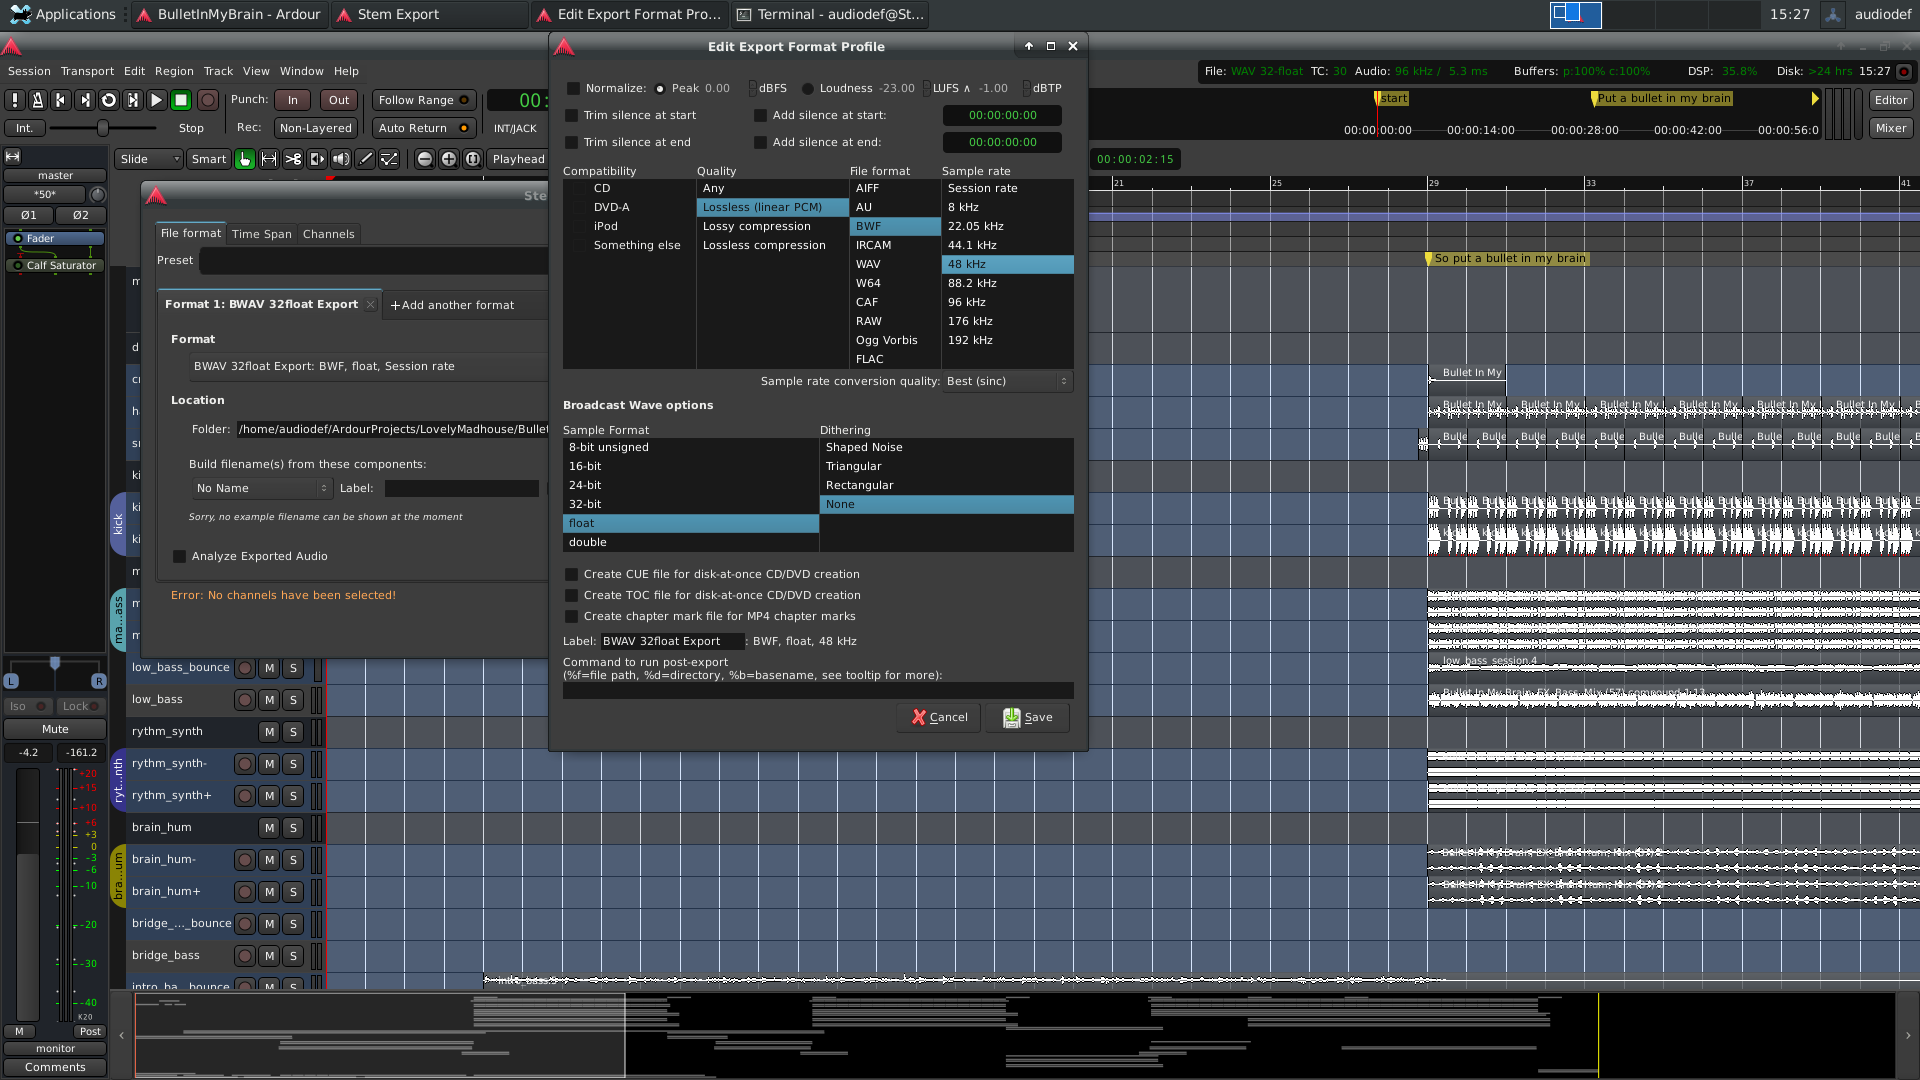
Export step 3: Select the BWAV (Broadcast Wave) format. The default, if you haven’t changed it, is to export at the session rate, which we don’t want. Click on the Edit button to the right of the selected format.

These are your format export options.

Export step 4: Change the sampling rate to 48kHz (or whatever your target rate is.) Click the Save button.
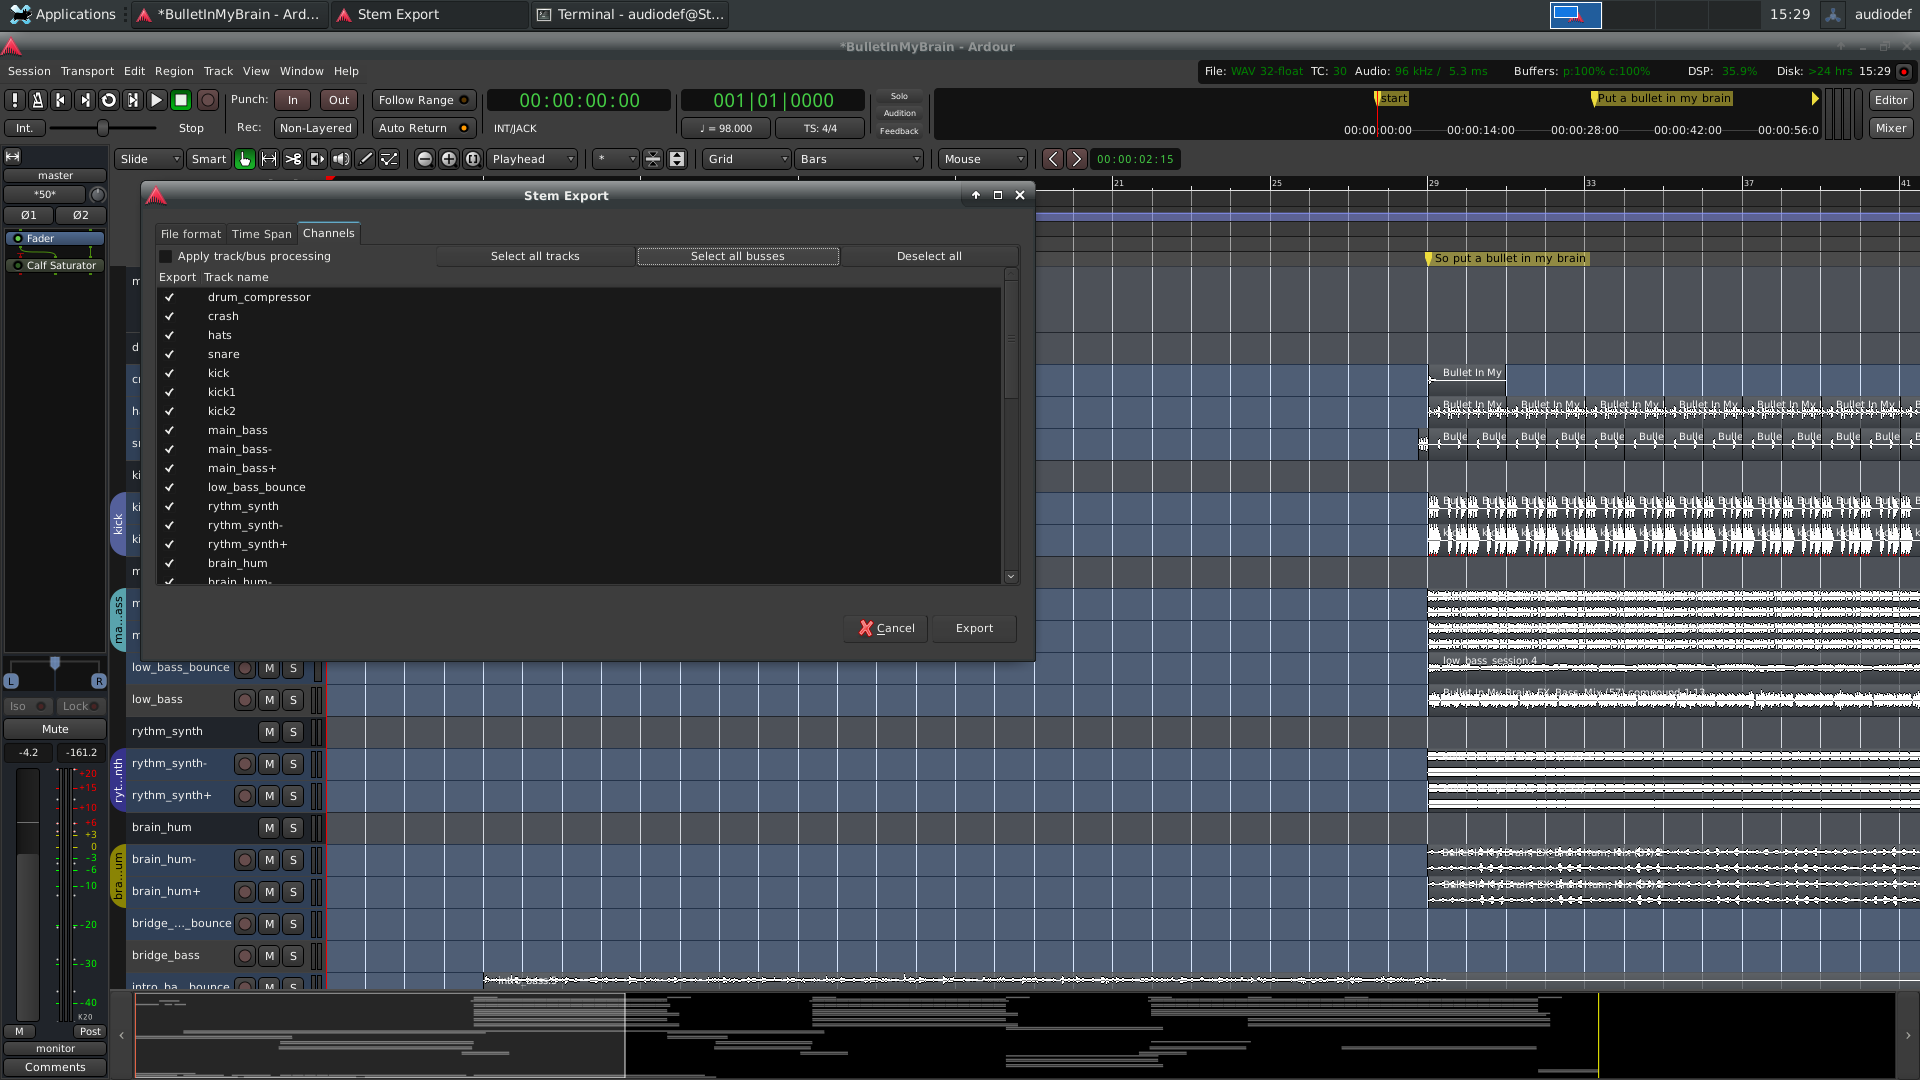
Export step 5: Now click on the Channels tab, then click on Select all tracks, then select all busses.

Regarding the Apply track/bus processing option: it depends. If you have plugins inserted into your tracks, you should make two passes: one with track/bus processing and one without. If you kept all your plugins in busses, you should select this option, since you will get your non-plugin track audio plus your plugin-processed busses.
All tracks selected:

All busses selected, alongside all tracks selected:
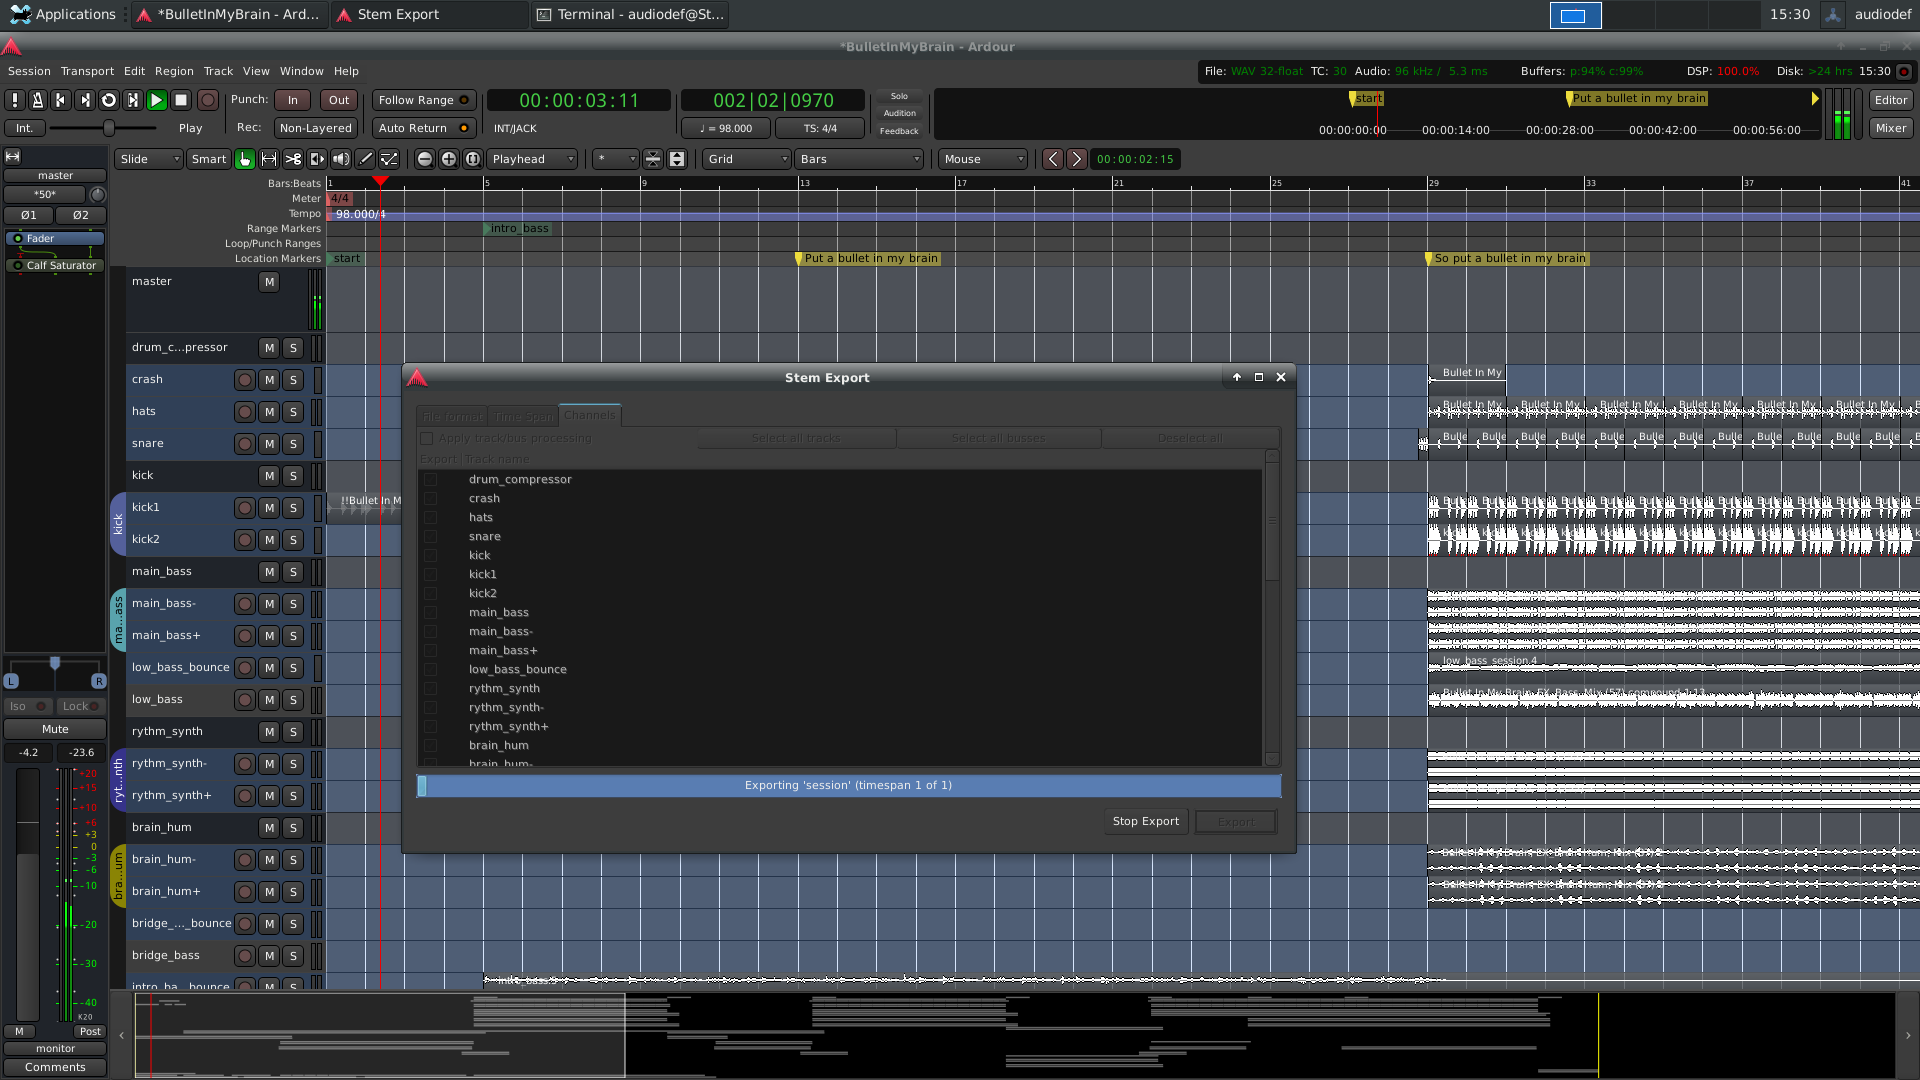
Export step 6: Let the export run. It will run slower than real time because Ardour is processing audio plus any plugins you’ve inserted into the session. The more audio processing your tracks/busses have, the longer it will take.
Export step 7: Check your files. You can use your favorite file manager or a terminal emulator. You should see something like this. Note that your files, by default, are exported to the export dir inside your session dir.

So that’s your export. Now we need to import these files into a new session.
Import step 1: Transfer the files to the computer where the new session will be created. If it’s the same computer, you’re all set. If not, how you do that is up to you.
Import step 2: Start Ardour and click on New Session.

Import step 3: Name your session. Use the Empty Template, or use another template if that fits your needs. Note that the session rate will be determined by your currently running JACK settings, so make sure it’s the rate you exported your files at.

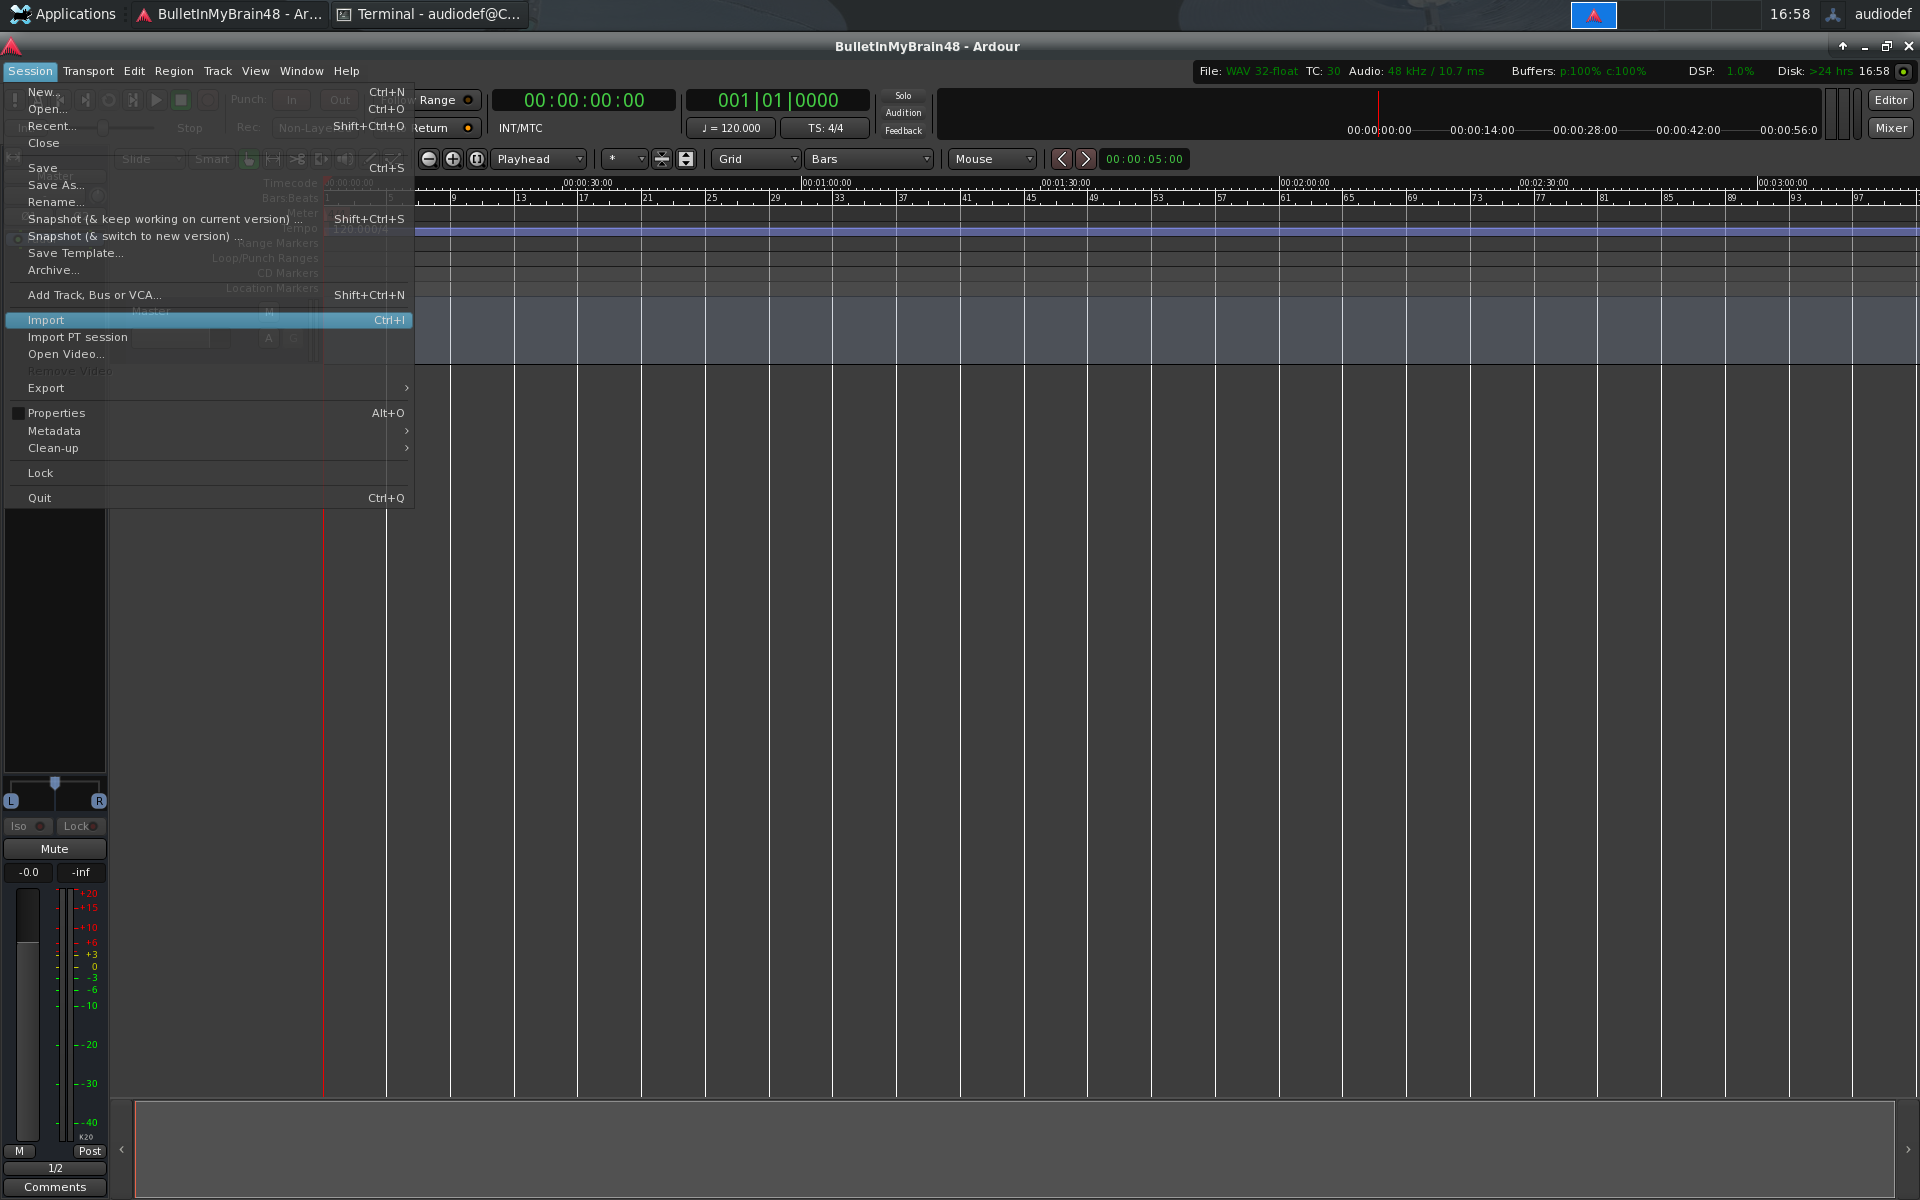
Import step 4: Select Session -> Import.
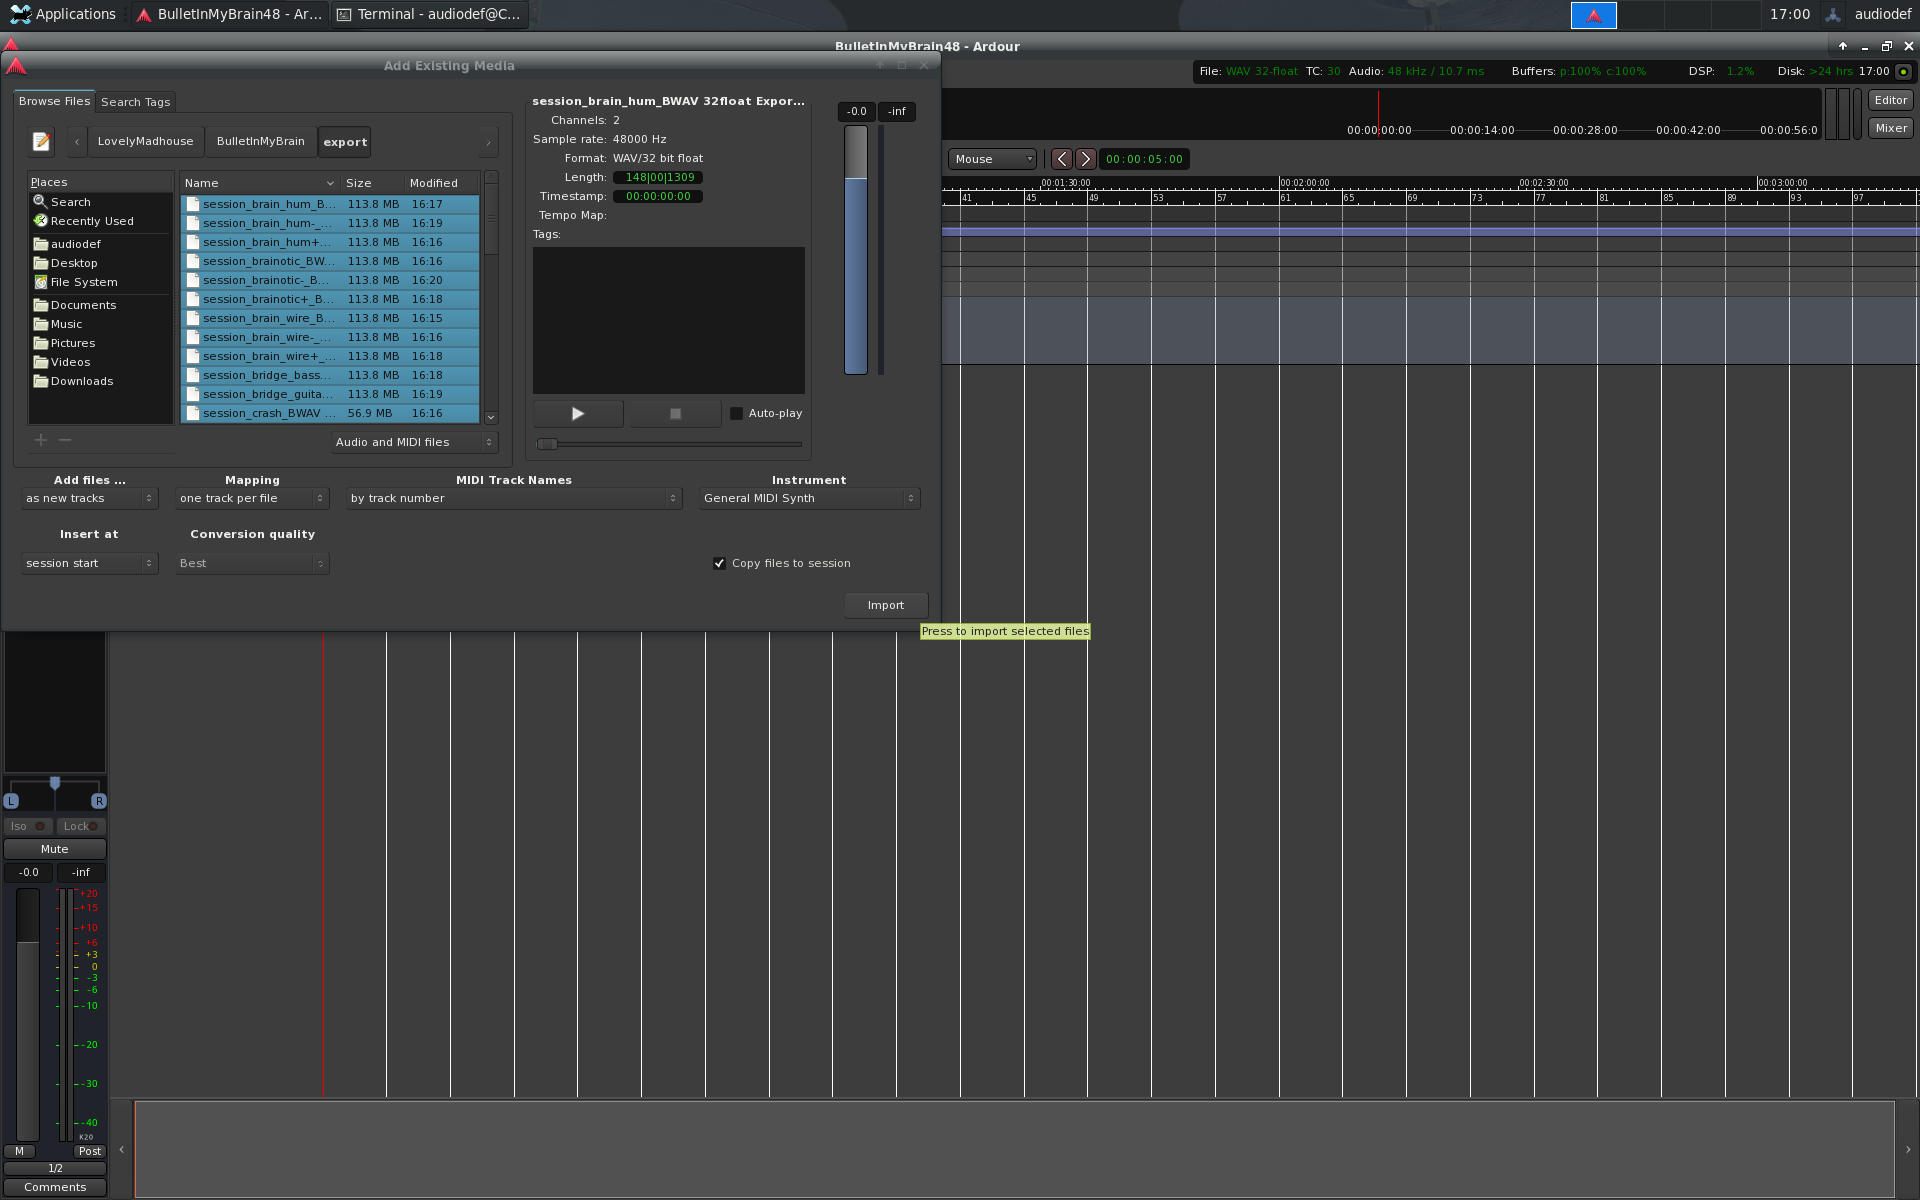
Import step 5: Navigate to where you’ve put your exported files.

Import step 6: Select all the files you exported from your old session. If there is a session rate mismatch, the sample rate will be highlighted in red.
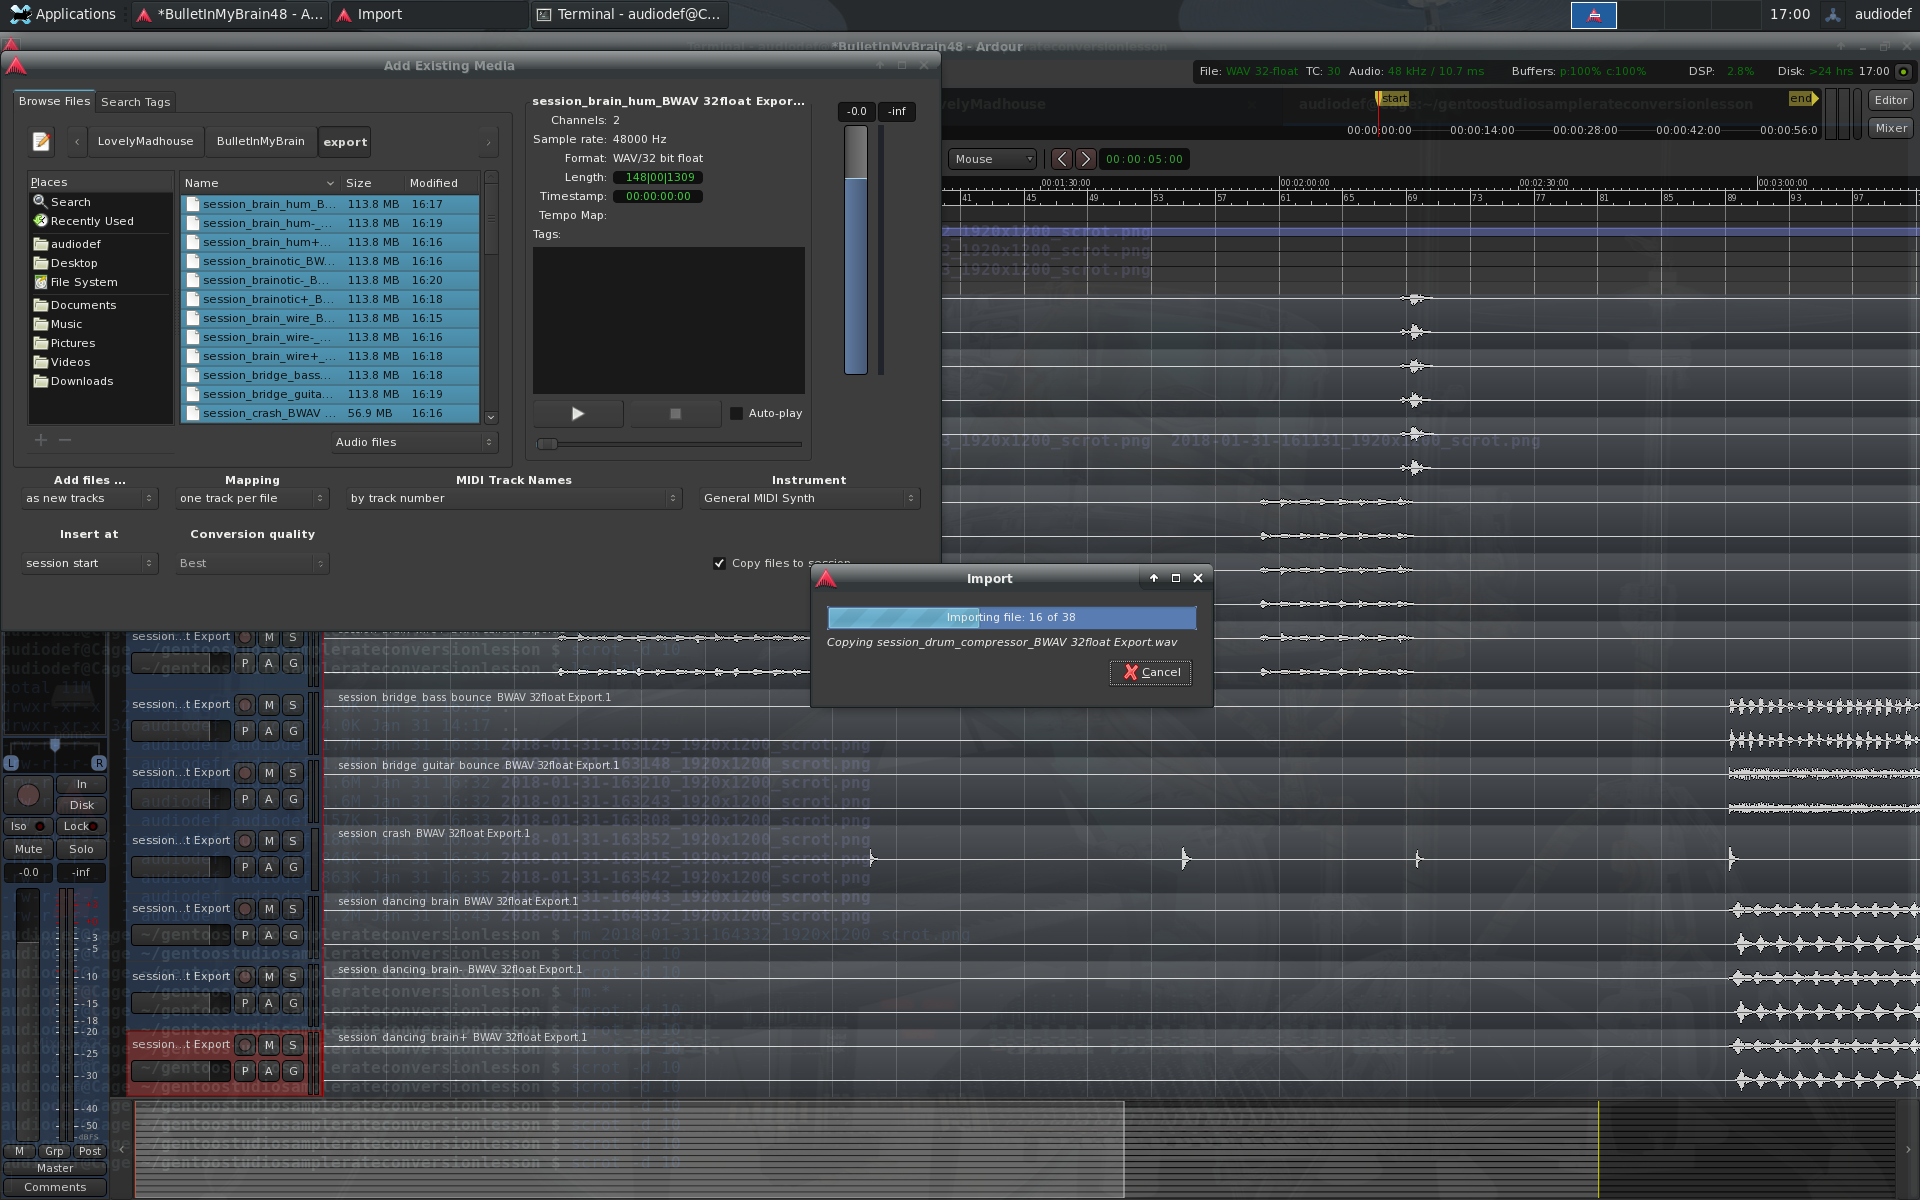
Import step 7: Let the import finish. It won’t take as long as the export, but it could take a minute or two, depending on how many files you imported and how large the files are.
Import step 8: When the import is complete, you might see the import dialog still open. Close it.
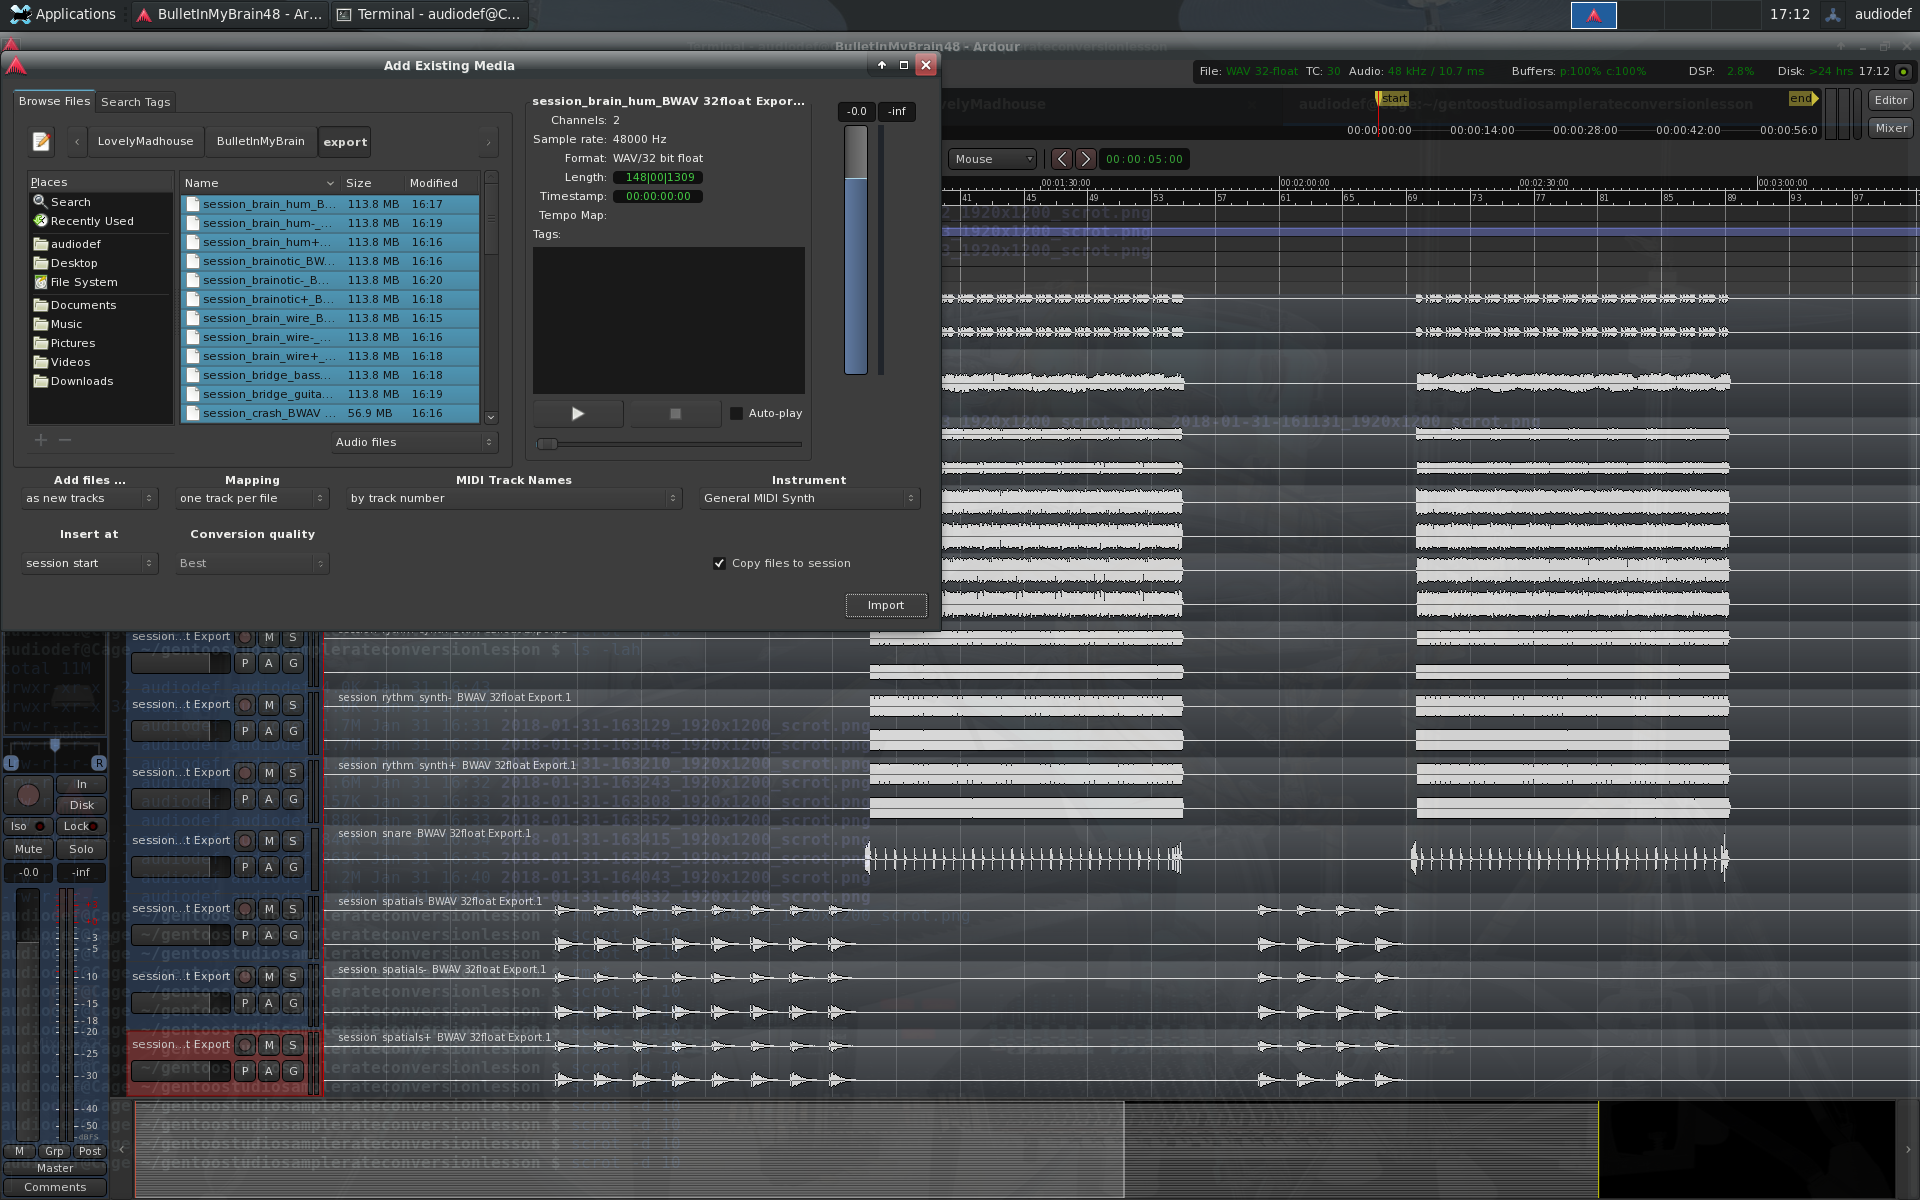
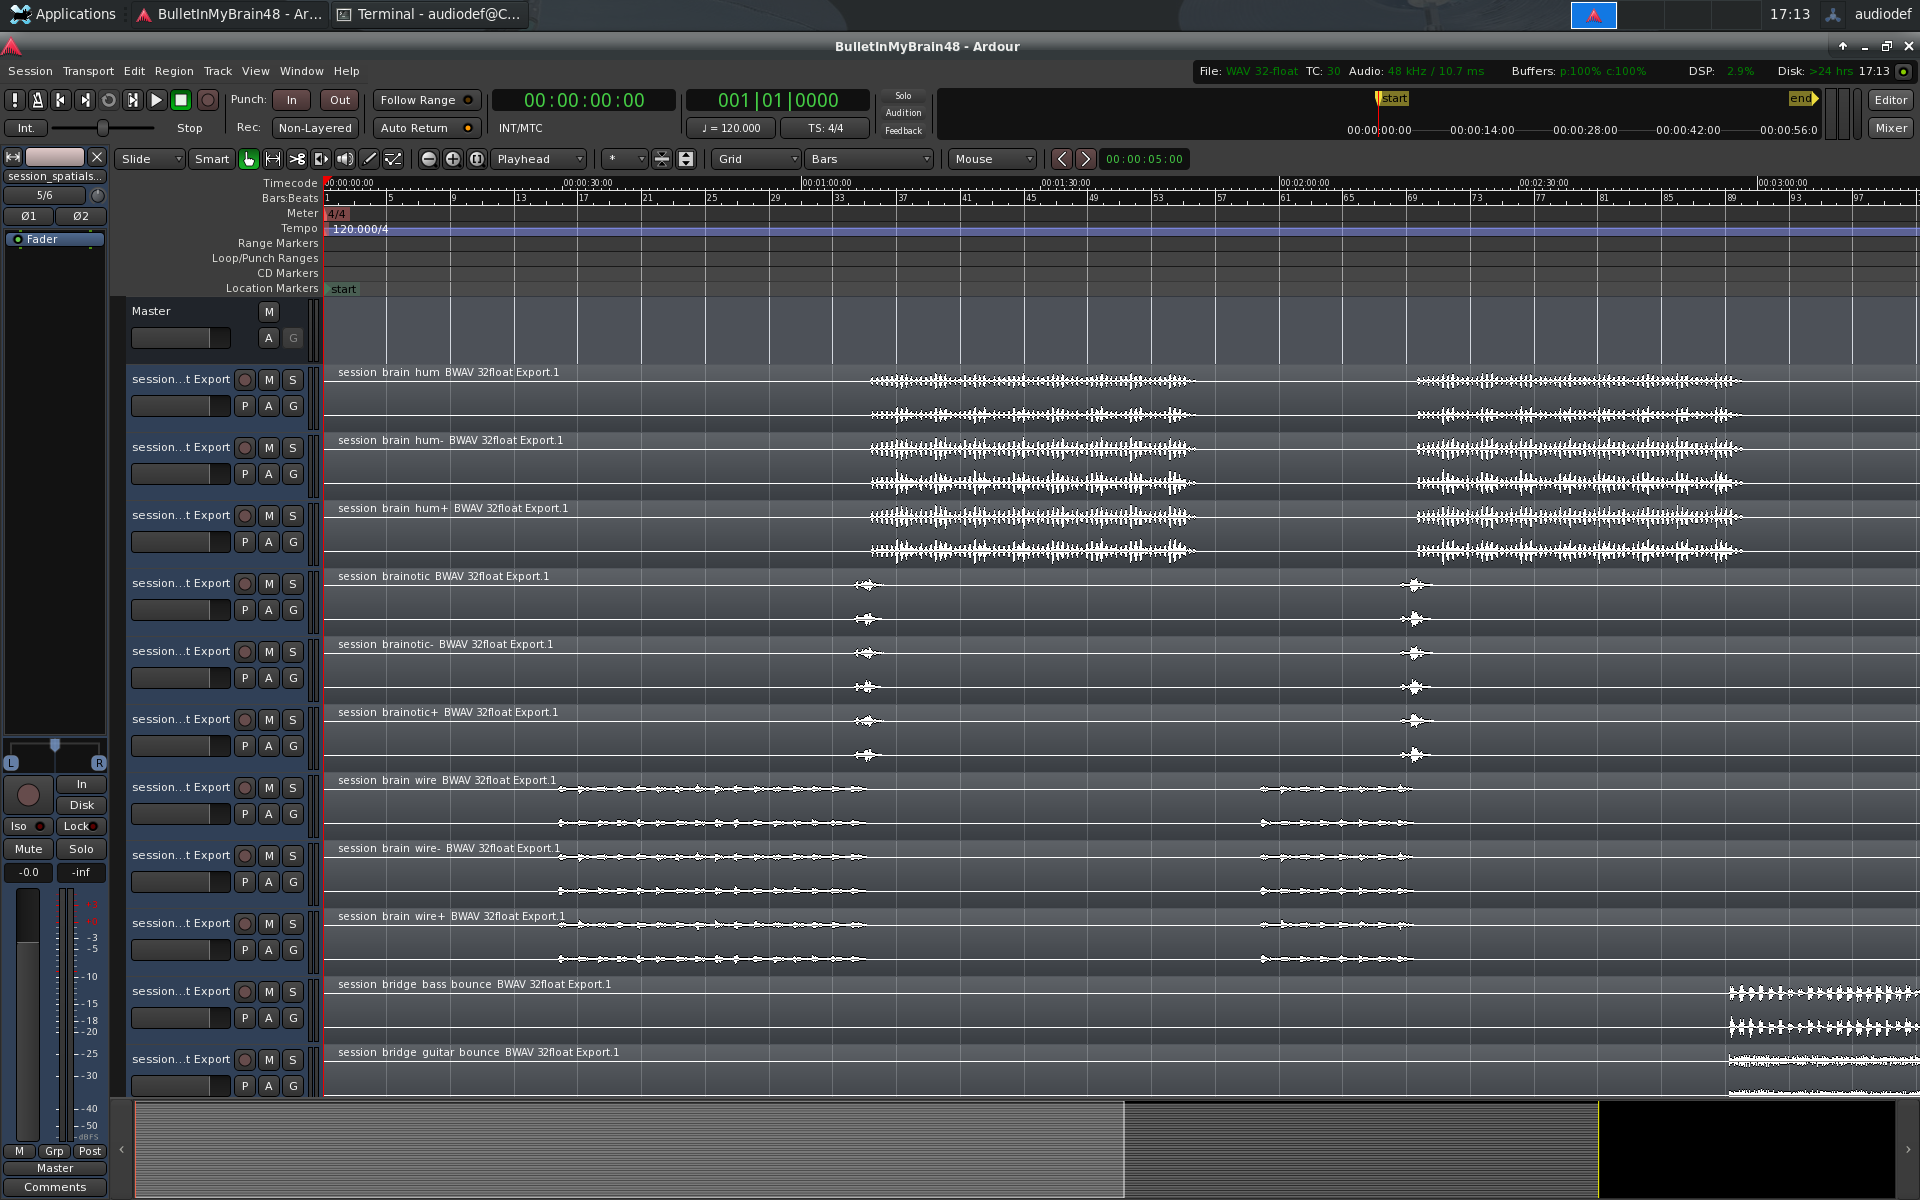
Your imported session.
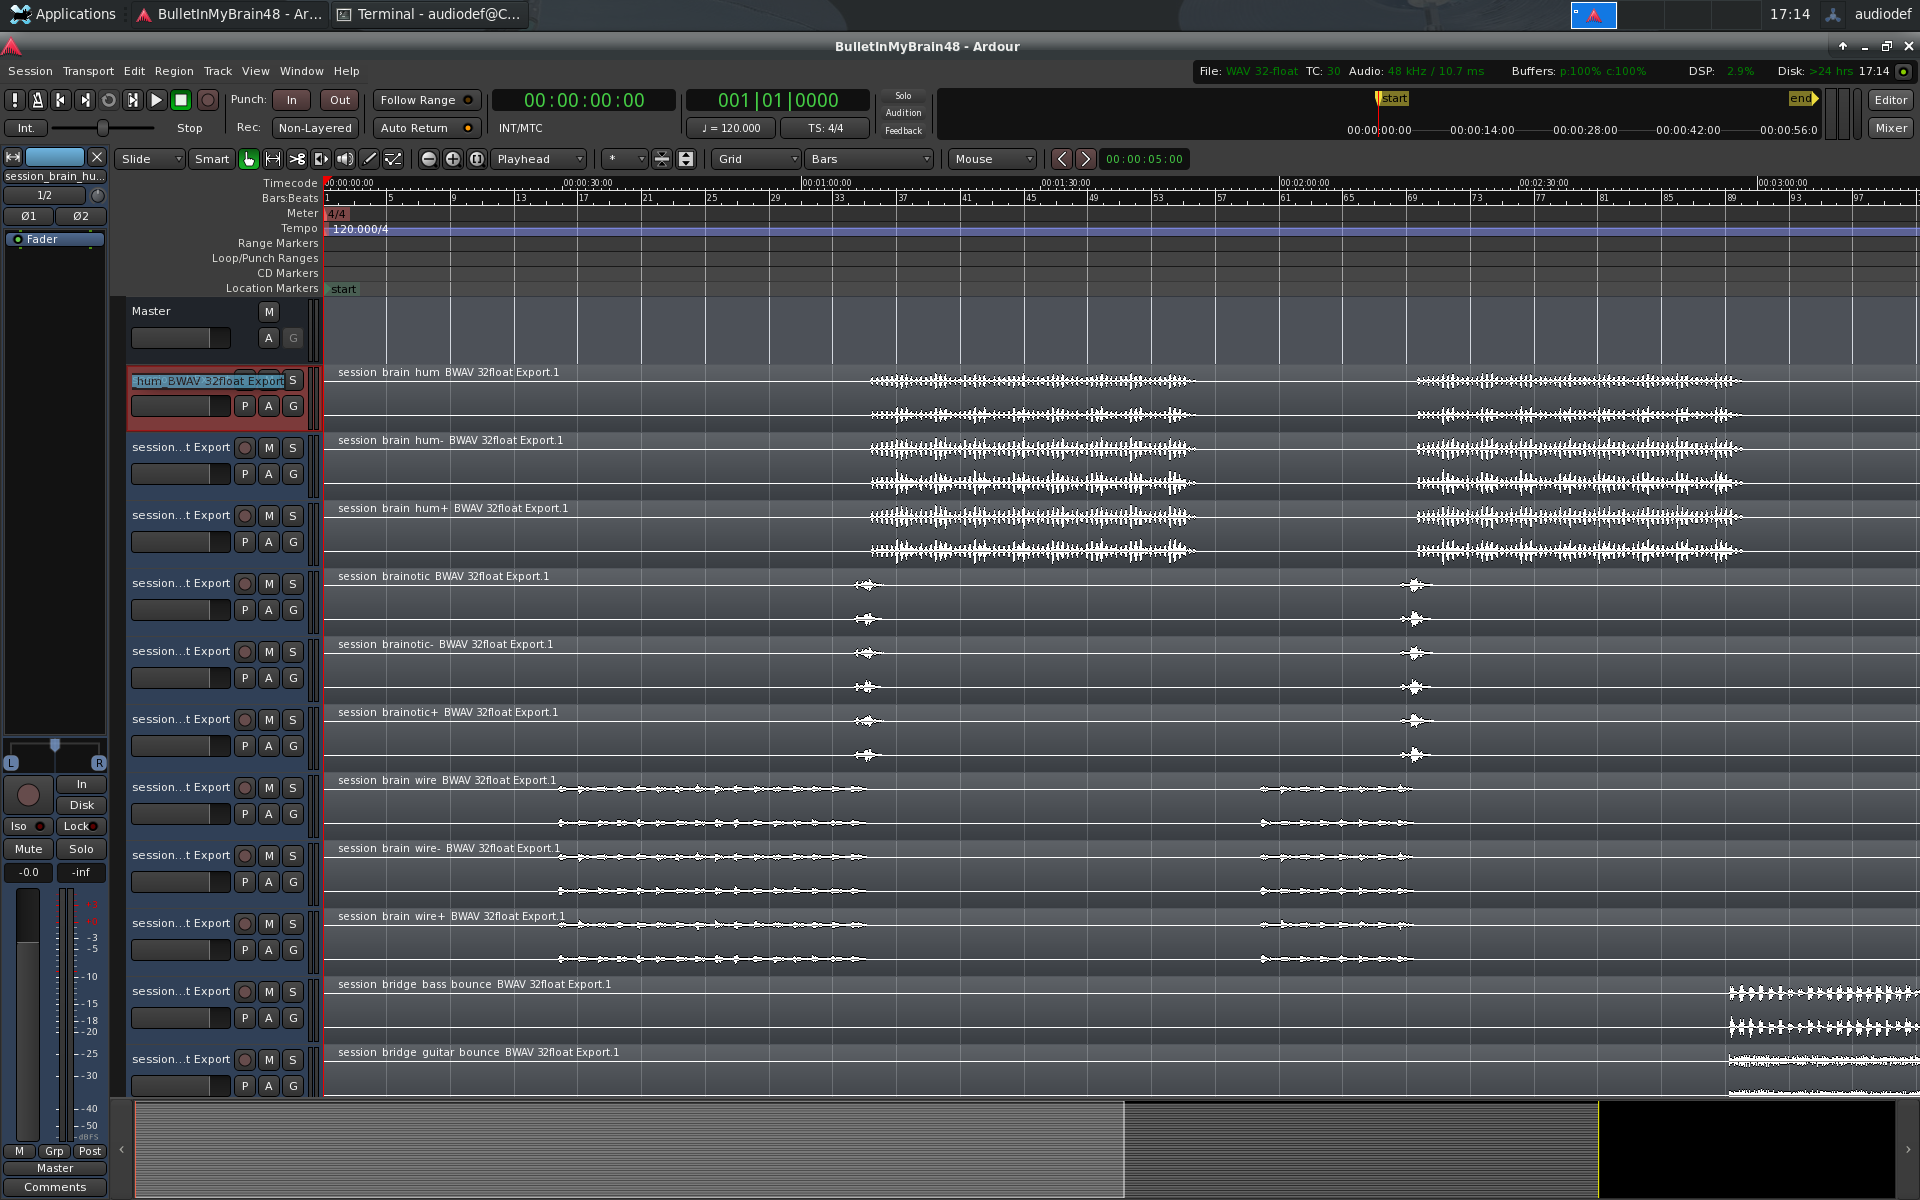
Import step 9: Adjust track names, if desired.
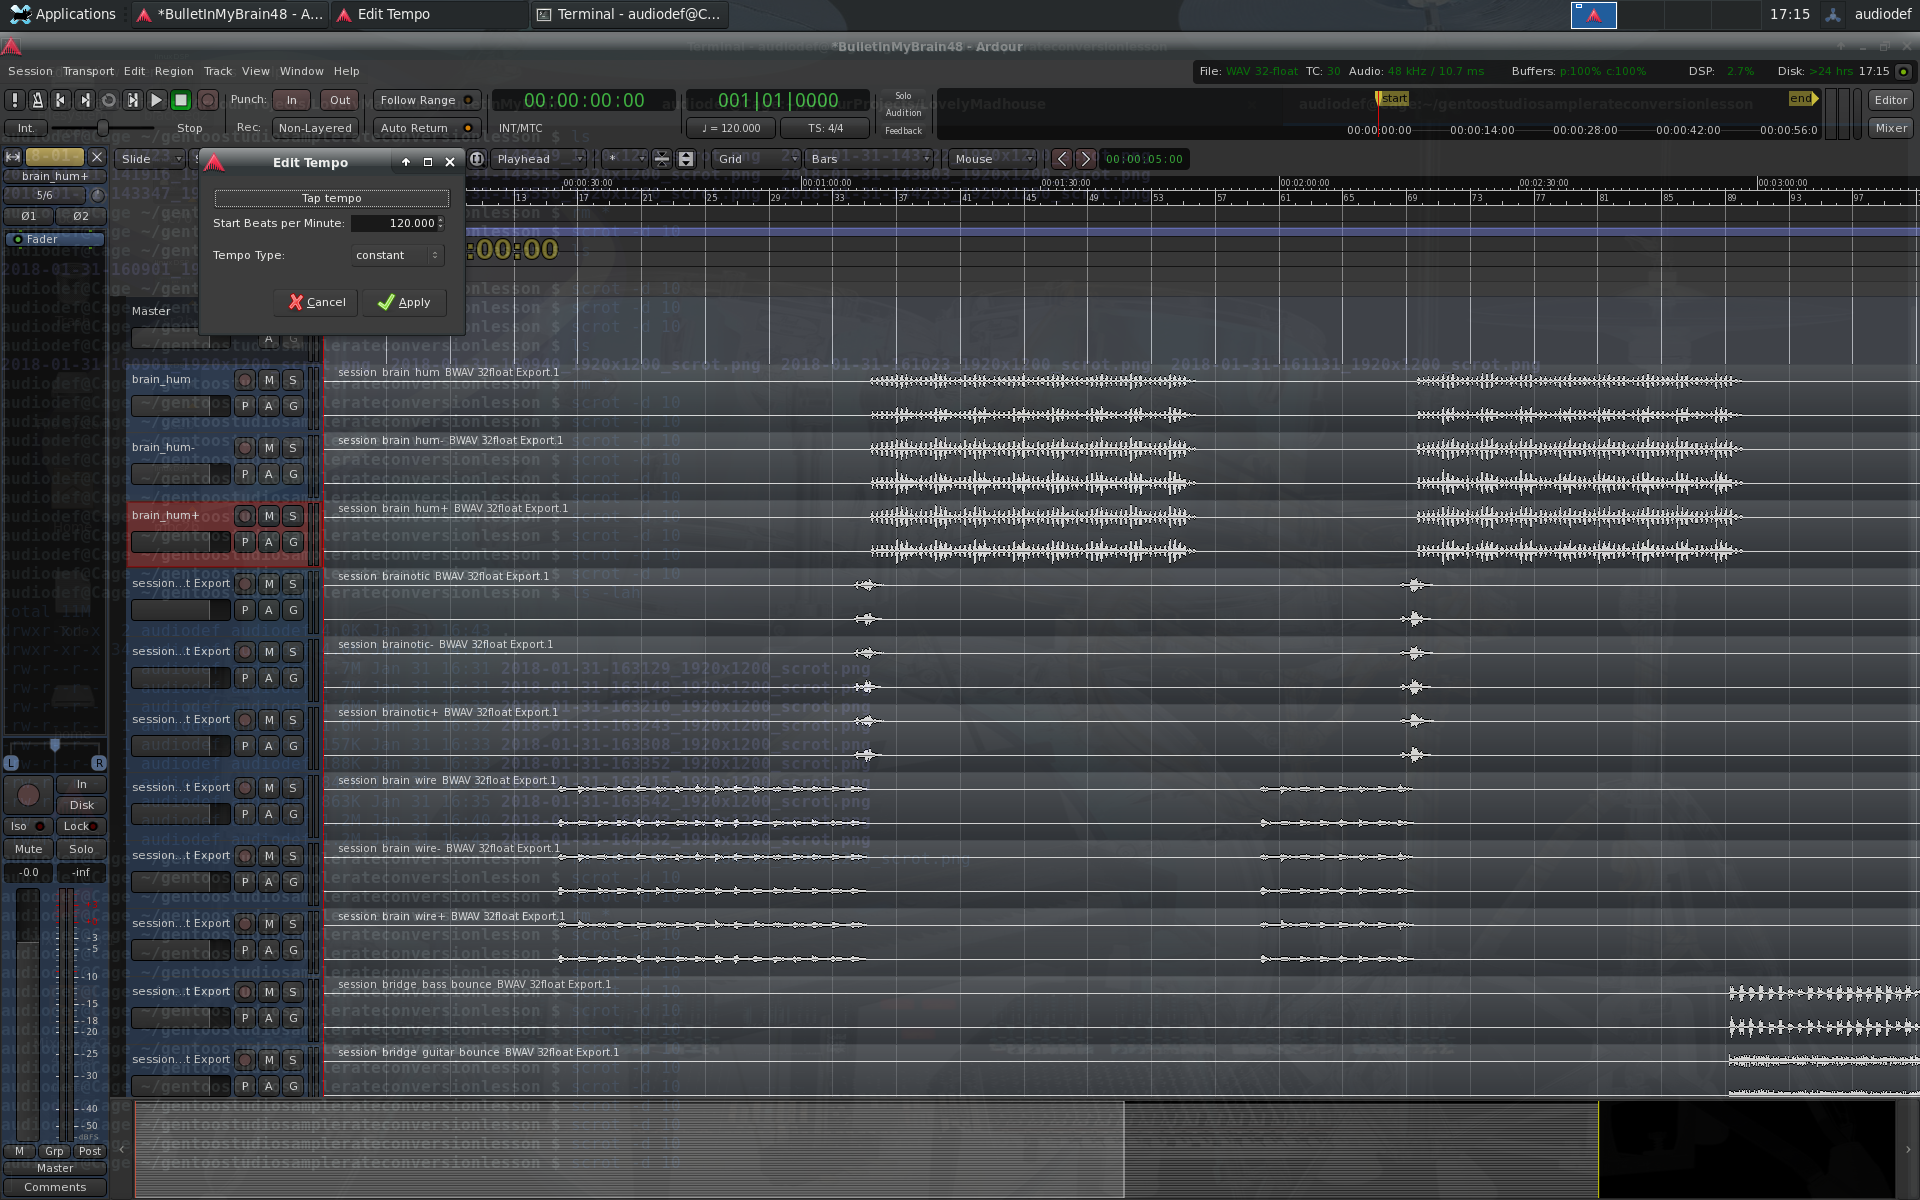
Import step 10: Set the tempo for this project. It won’t play at the wrong speed, but the timeline bars won’t line up with your waveforms unless it’s at the same tempo as the old session.
That’s basically it. The rest of the work will involve a mixing session to make sure everything is the way it should be. Remember that you exported your effects busses, so there’s no need to add the effects back into the mix. However, another way to handle this – and this works if you have access to both the original and new sessions – is to note the plugins used and their setting and set them up again in the new session. This can be tedious, but is useful if you need to continue working on the session with different hardware at a different session rate. Which makes me think a cool feature would be exporting/importing plugin settings.
I hope you found this lesson useful.
I spent a great deal of time to locate something like this
I’m glad you found it useful.
I thank you for this very good tutorial to change the sampling rate. I had to do recordings for hires and video. With this I got it managed. Thanks a lot!
You’re welcome!